

This freshly baked vegan pita bread recipe is easy to make from scratch using all-purpose refrigerator dough. They are incredibly soft and flavorful plus so fun and absolutely magical to make. I've included two ways to cook them (stove top or oven) - either way, you'll end up with incredible, warm puffy homemade vegan pitas!
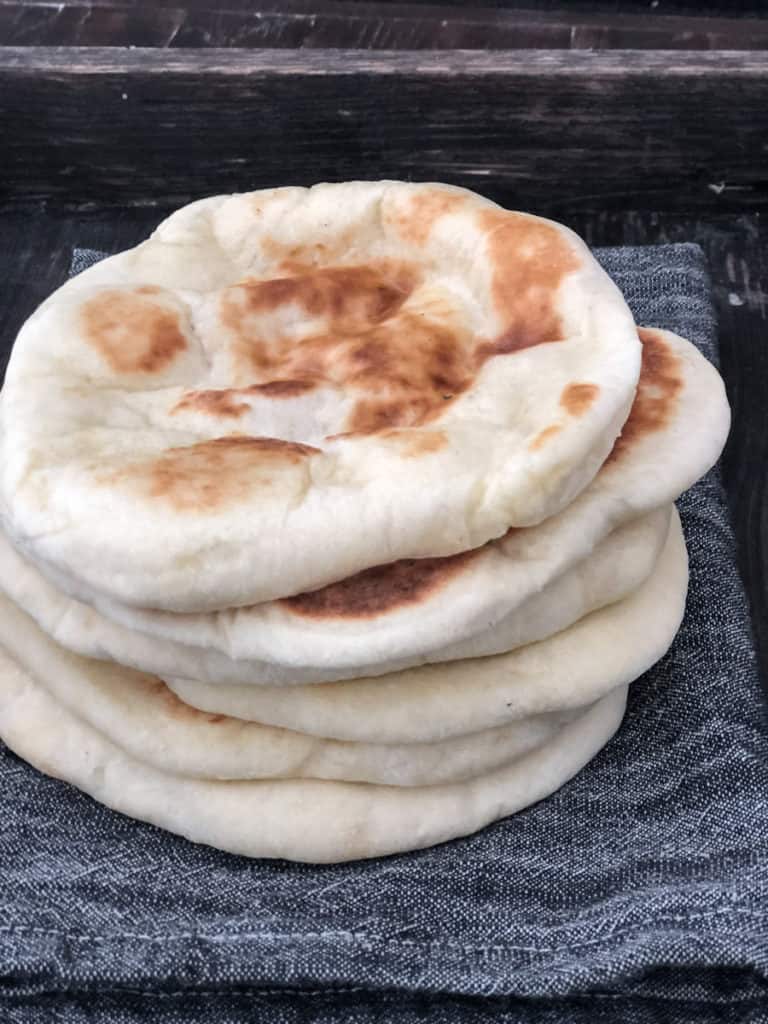
Hot out of the oven with melted butter and salt, these simple vegan pitas are hard to resist! But they are equally scrumptious stuffed with creamy hummus, crispy falafels and drizzled with lemony, everyday tahini sauce, my famous sweet and spicy tahini sauce or this incredible spicy green tahini sauce!
We love these pitas because they are so simple - made without eggs or dairy, and no mixers or fancy equipment needed, no kneading required and clean up is a breeze. Plus we can make a small batch or large batch, and they freeze really well so are perfect for lunches and meal prep!
Ingredients of Pita Bread
- all-purpose refrigerator dough
- refrigerator dough can be made up to 14 days before baking and consists of flour, water, yeast, salt, maple syrup, and oil. Simply mixed in a bucket and left in the fridge until baking day.
- to determine the size of chunk you need: decide if you want a big batch or small batch of pita bread (x 50 - 75 grams per pita pocket)

How to Make Pita Bread from Scratch
For this easy vegan pita recipe, simply tear off a piece of refrigerator dough, shape it, and bake it! One of the best things about the bucket of dough is no kneading, and you can skip the waiting and rising time by making a bucket of dough up to 2 weeks in advance. Imagine enjoy a warm, freshly baked pita in under an hour!
The first time I made pita pockets, I was in awe of their magic! It's pretty incredible to watch them puff up - the kids loved it too!
Let's get started with the easy step-by-step method for making pita bread at home!
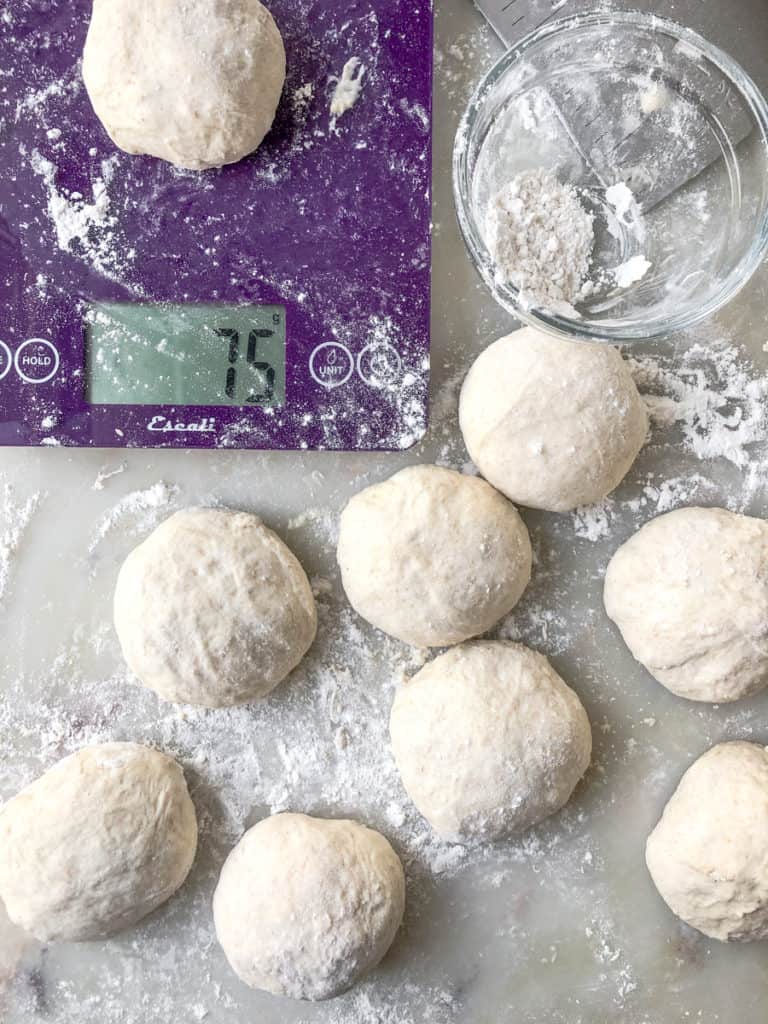
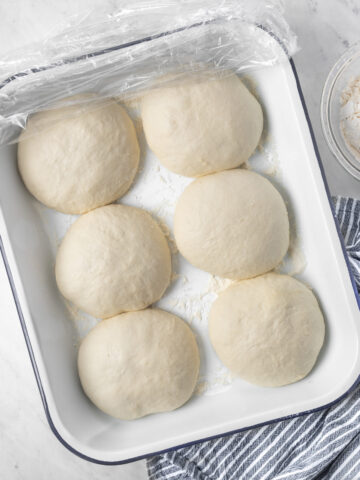
- Divide the chunk into equal pieces: ~ 50 grams (small) - 75 grams (medium) each. Roll each piece into a ball. Place on lightly floured surface and cover with a clean kitchen towel or pastry cloth for 15 minutes to rest until the dough comes to room temperature.
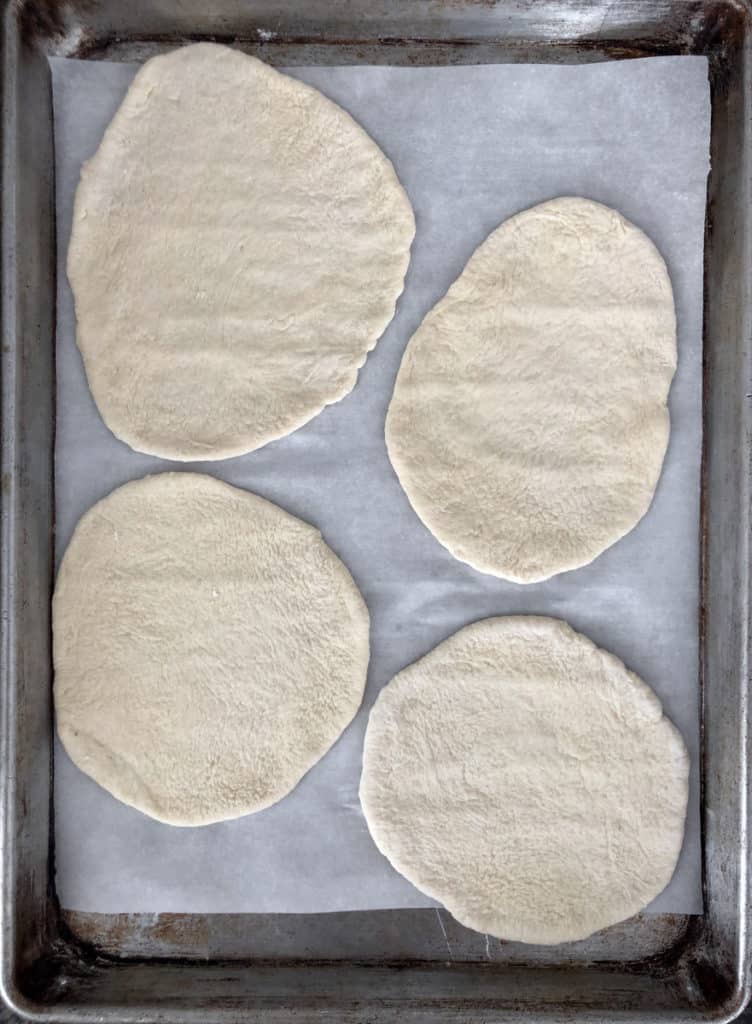
- Roll the balls: working with one ball at a time, gently flatten and begin to press the dough ball between your fingers to form a disc (like a pizza crust). Place on lightly floured surface and roll to ¼" thick, 5-7" circle (depending on ball size).
- Place on a parchment-covered baking sheet: cover with a clean kitchen towel or pastry cloth to rest while you roll the remaining pitas and the oven is preheating.
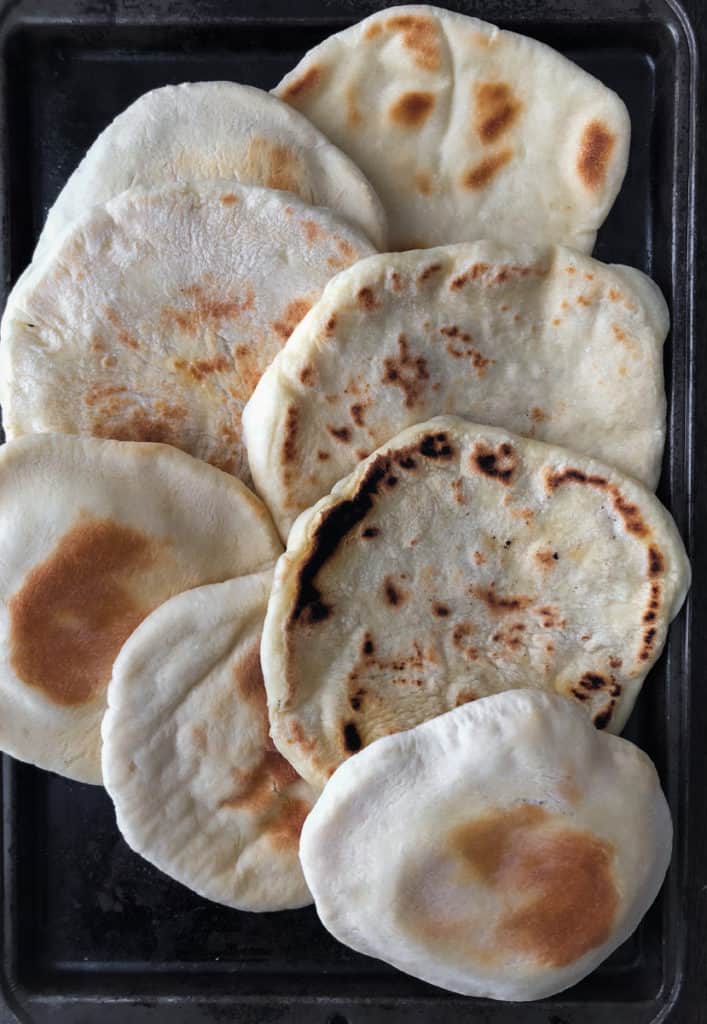
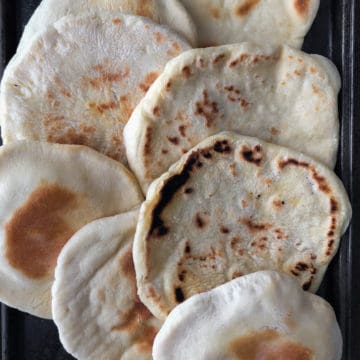
- Cook: on the stove or bake in the oven until soft, lightly golden, and puffy!
How to Cook Pita Pockets (2 ways)
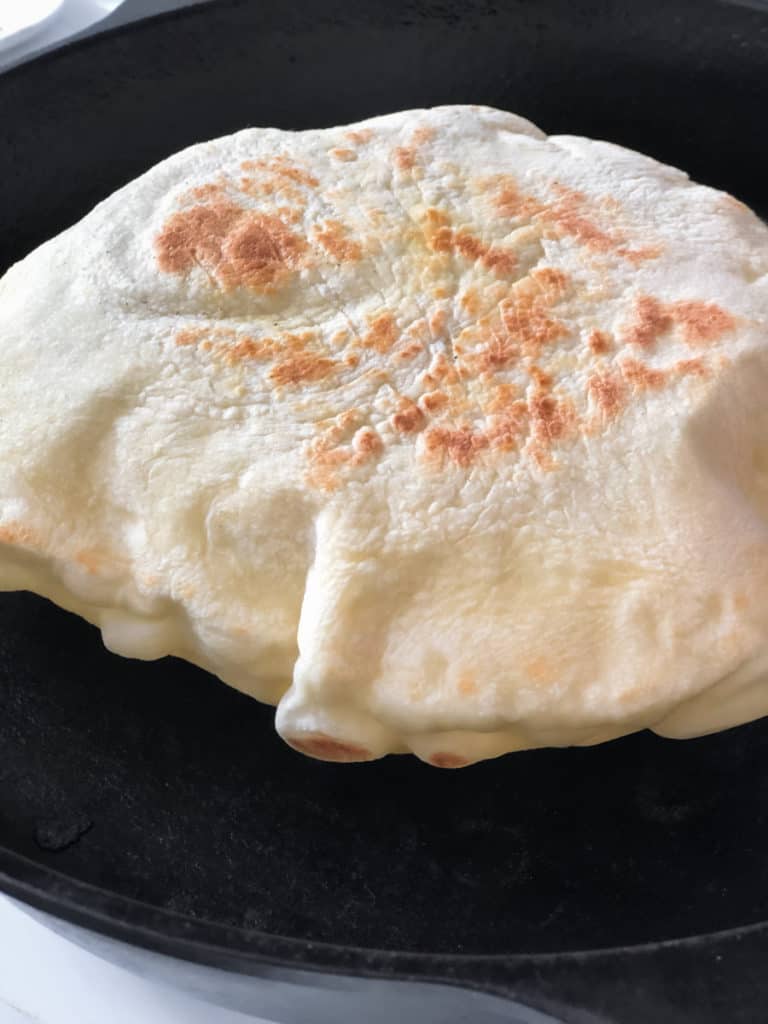
These pita pockets are so fun to make. They puff way up like a balloon in no time in the oven or on the stove top and then collapse which makes the pocket pitas are famous for.
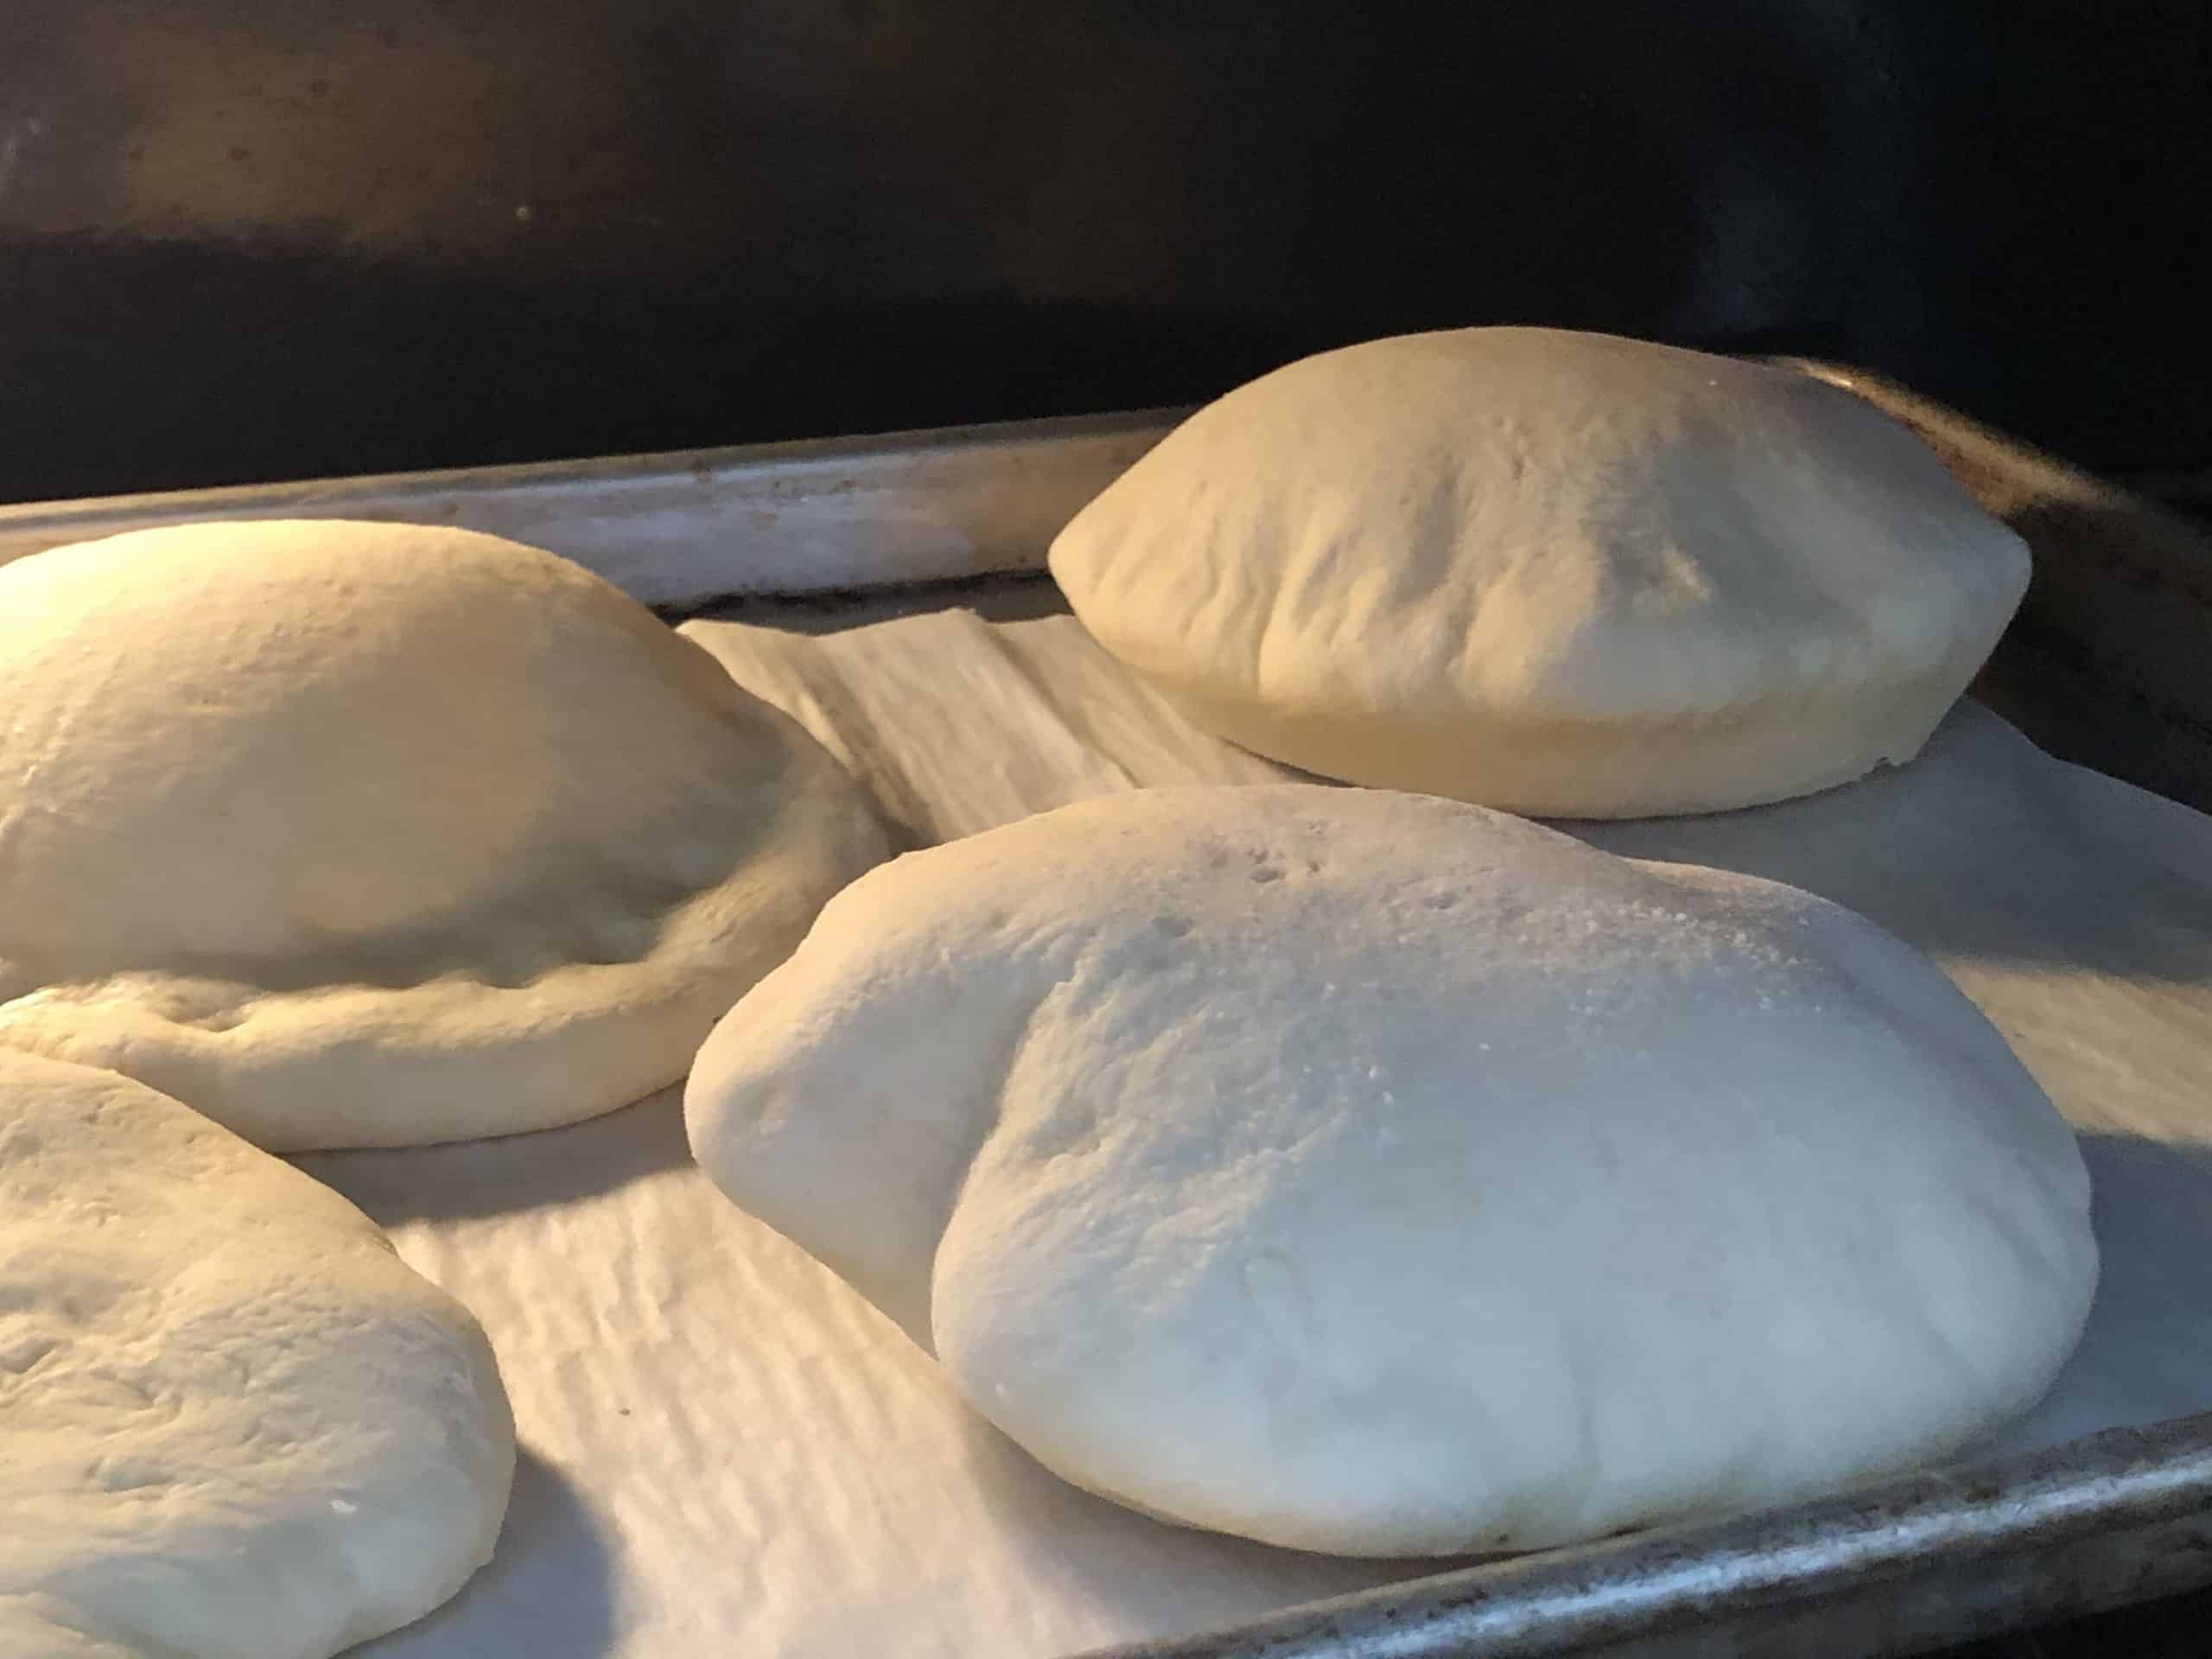
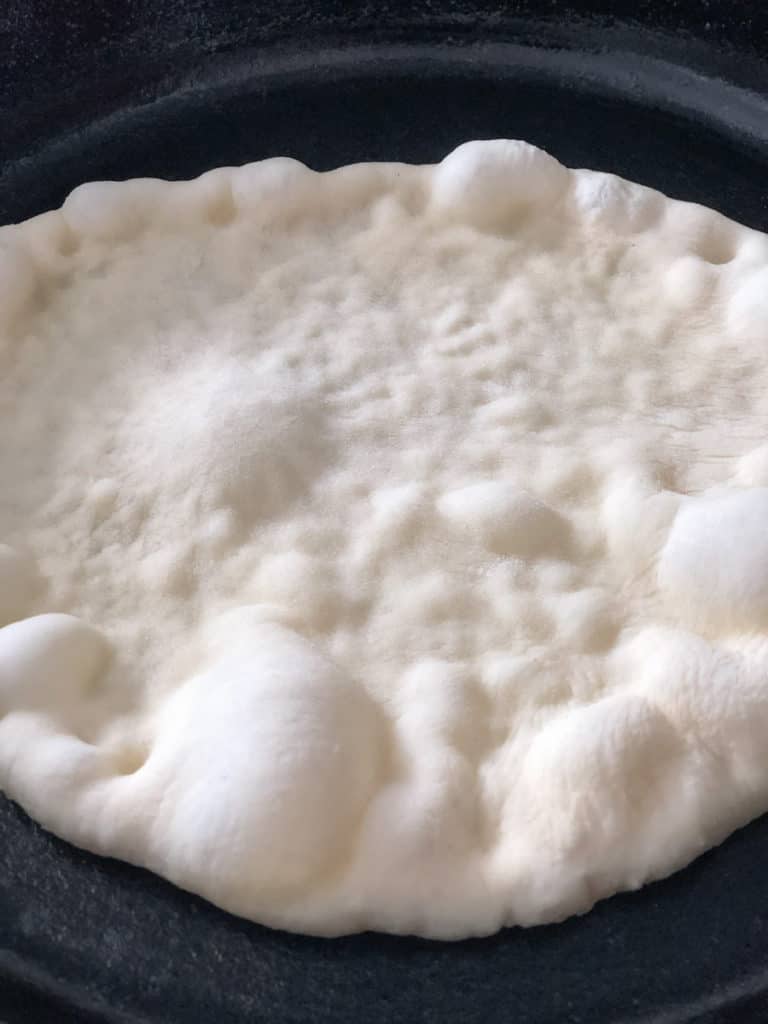
Oven method for baking homemade pita bread - preheat the oven (rack in middle position) to 470º F while you roll out the dough. Puffing Tip: Let the oven get nice and hot so when the dough hits the heat it creates steam and the pitas puff up.
Place the pita rounds on the baking sheet. Bake for 3-5 minutes, gently flip the puffed pita pockets using a kitchen towel or a wooden spoon. Cook for another 2-3 minutes. Remove from the oven, admire how amazing they are, then cover them up in kitchen towels.
Cooking Tip: Watch the magic through the oven window. Don't be tempted to open the oven until the pitas are puffed and ready to be flipped.
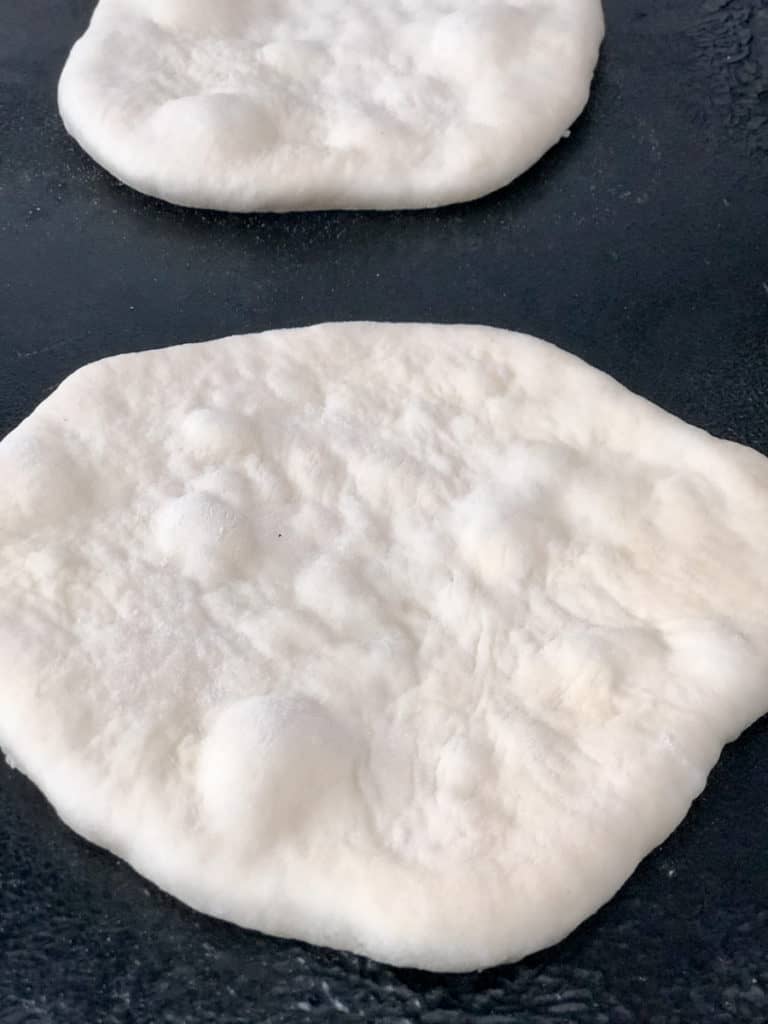
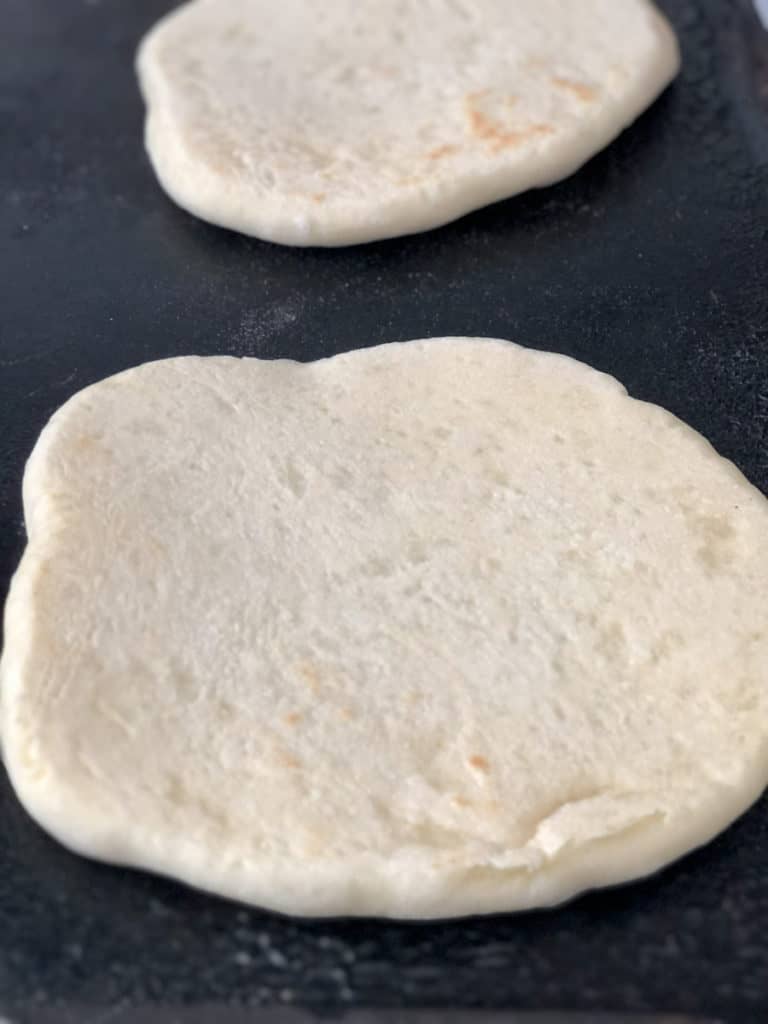
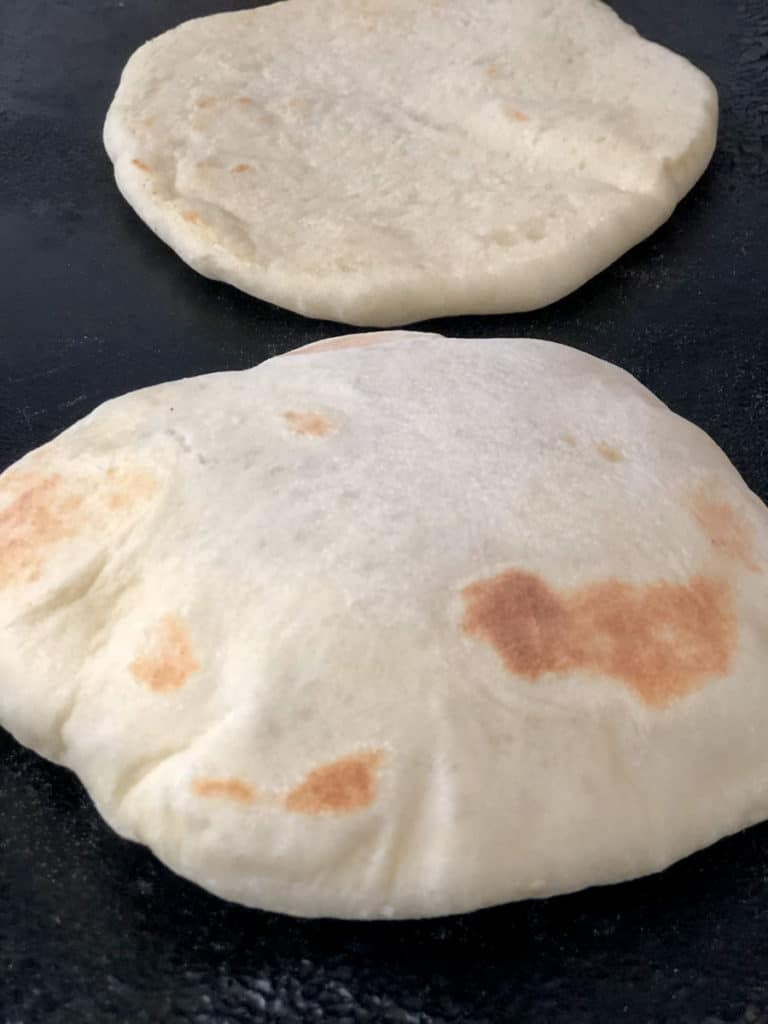
Stovetop method for cooking homemade vegan pitas - cook on a hot, non-stick griddle or a seasoned cast iron pan. Place pita round on hot pan. After about 30 seconds it will start to bubble up, flip it, don't touch for about 45 - 60 seconds, it will bubble and puff. Flip one more time. If it's not puffing up yet, press the middle of the pita using a towel to protect your hand and watch it puff all the way up!
Cooking Tip: if the pita gets stuck down in one spot, press next to it and that can help move the air around and unstick it. Sometimes you have to fiddle around with the heat settings a bit to find the perfect temperature to get those pitas puffing up consistently.
Pita Chips (leftovers)
If you overdo cooking the pitas (it happens) or end up with a couple stale pitas, make homemade pita chips! Pita chips are the perfect accompaniment for dips (spicy hummus) and sauces (queso cheese) as well as a nice crunchy scoop for guacamole or vegan chili.
Here's a simple recipe/method for making easy pita chips: Preheat oven to 400º F. Cut the pita into triangles (or any shape), brush with melted butter or olive oil (garlic infused), sprinkle with your favourite spices (eg. garlic, basil, zatar, salt, pepper, hot pepper flakes). Cook on baking sheet for 5-8 minutes until lightly brown and crispy. Alert: the pita chips can burn easily so keep your eyes on them!
Storing and Reheating Pitas
Store baked pitas at room temperature in a bag for a few days or in the fridge for a week.
Cooked pitas freeze easily which is perfect for meal prep. Make a big batch, let them cool, and then pop them into a freezer friendly bag.
Take one or two out at a time as needed, let them come to room temperature, and enjoy.
To reheat the pita bread, place in the oven (350º F oven for 5 minutes), the microwave (wrapped in a towel) or in a pan on the stove over medium heat until heated through.
What to Serve with Pita Bread
There are endless uses for soft, chewy, freshly baked pita bread of course! But here are a few of our favourite ideas:
- on a vegan mezze platter with hummus, guacamole, pico, greek olives, dates, pickled hot peppers
- stuffed with falafel, tahini, tomato and pickled onion
- vegan shawarma - this wrap made with soy curls is epic, 2 sauces that will rock your world
- hot from oven with melted garlic butter and salt
- scoop up vegan chili, soup, sauce, curries
FAQ - Vegan Pita
Pita bread is typically made with flour, yeast and water. However, if you follow a vegan diet, check the ingredients to be sure there are no dairy products.
Sometimes a pita will not puff because the heat is too low. Heat a dry skillet on medium-high. Add the pita round, and when it starts to bubble, flip it right away. Then flip it again after about 20-30 seconds. This will make it puff up and create the signature pocket. Even if a few don't puff up, they are still delicious and can be served as a naan bread!
If you Love Bread . . .
Make a bucket of no knead, no fuss, all purpose refrigerator dough for easy fluffy white sandwich bread, easy vegan dinner rolls, vegan cinnamon rolls, soft buttery breadsticks, easy pita bread, and much much more.
Plus have you tried this super easy and popular no knead overnight bread?
Did you make my easy Vegan Pita Bread?
I'd love to see it! Please leave a comment below and tag me on IG @ceeceecooks with any photos!
NEVER MISS A RECIPE: Sign up for my email NEWSLETTER!
Easy Vegan Pita Bread (soft + fluffy)
Rate this recipe!
INGREDIENTS
- 400-600 grams chunk of dough from refrigerator dough recipe
INSTRUCTIONS
Bread Dough Recipe (made ahead of time)
- This pita bread is made from a bucket of All Purpose Refrigerator Dough recipe which can be made up to 2 weeks before baking day.
Shaping and Rolling the Pita Dough
- Divide your chunk of dough into 50-75 gram balls (you can make bigger or smaller!).
- To roll the pitas: working with one ball at a time, flatten the dough ball with the palm of your hand. Pick up the disc and work it into a bigger circle with your fingers.
- Place back on lightly floured surface and roll to ¼" thick, 5-7" circle (depending on ball size).
- Place on a parchment-lined board and cover with a clean kitchen towel or pastry cloth while you roll the rest of the pitas and the oven is preheating.
Baking the Pitas (Oven) Preheat the oven to 470º (rack in middle position)
- Place the pitas on a parchment-lined baking sheet and into the oven on the middle rack.
- Cook for 3-5 minutes. Flip the pitas using an oven mitt or wooden spoon. Cook another 2-3 minutes.
- Remove from oven and place in towel-lined bowl. Cover to keep warm and soft.
Cooking the Pitas (Stovetop) Preheat the griddle
- Preheat a griddle or large cast iron pan over medium-high heat.
- Place the pita rounds on the hot pan and cook on medium-high heat for 30 seconds until they start to bubble.
- Gently flip the pitas and cook for another 45 seconds. Flip again.
- If not already puffed up, press the center of the circle with an oven mitt or towel (to protect your fingers).
- The pitas will turn slightly golden and puffy.
- You may have to fiddle around with the heat setting to get the right temperature for your pitas to puff up consistently.
NOTES
This recipe is from simplyceecee.co food blog. All images and content are copyright protected. Please do not use my images or republish this recipe without prior permission. Thank you.

Leave a Reply