All Purpose Refrigerator Dough Master Recipe (vegan)
Servings: 4 1 pound loaves
Equipment
- bucket with lid
- digital kitchen scale (recommended)
Ingredients
- 680 grams water* (room temperature)
- 1 tablespoon yeast
- 50 grams oil or melted vegan butter
- 2 tablespoons maple syrup / agave
- 1000 grams flour*
- 20 grams table salt (or 1 tablespoon coarse ground)
Instructions
- I recommend using a food scale for this recipe!
- In a large plastic bucket or large bowl combine the water (~3 cups*) and yeast. Stir until dissolved. In the winter in my climate (cold and dry), I sometimes add a couple extra tablespoons of water to be sure there are no dry bits and the flour is hydrated.
- Add the oil (scant ¼ cup) and maple syrup and stir to incorporate.
- Add the flour (~6 ½ cups*) and salt (~3 teaspoons) to the bucket. I use all purpose flour or bread flour. *scoop and sweep method: I use a ¼ cup scoop to fill my 1 cup scoop and then level it with the flat side of a kitchen knife. Note: Weighing the ingredients is the most accurate.
- Using a dough scraper, your hands or a large spoon, mix together until all the flour is completely incorporated. I wet my hands several times to help get all the dry bits from the bottom of the bucket.
- The dough should be tacky/sticky but not sloppy or dry. Depending on what your climate is like and the flour you choose, you may need more or less water.
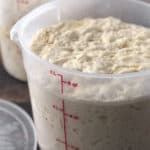
- Place lid on the bucket* or cover the bowl with a plastic bowl cover (creating a nice warm, draught-free environment for flour to hydrate, the yeast to grow and the dough to rise).*As the yeast is activated, it will produce gas so the bucket/container should not be airtight. I poke a small hole in the top of my dough bucket which works well or just place lid on top of bucket without sealing it.
- Leave the dough at room temperature for ~2 hours to rise.
- Place the bucket of dough in the fridge for up to two weeks. Pinch off a piece when you are ready to bake a whole loaf or just a bun or two.
- Pro Tip - remember to cover the hole in the lid with a little piece of tape after 2 days.
Notes
This refrigerator dough can be used right away after the initial proof, but it is much easier to handle (less sticky) if it spends some time in the fridge first. You may require addition flour on the work surfaces when shaping and rolling the dough when used prior to refrigeration.
Yeast can be stored in fridge for a couple of months or for longer in the freezer.
This recipe works really well at my elevation (1045m/3438f) and climate (sunny but cold and dry).
Flour - if you don't have a digital scale (recommended), use the scoop and sweep method. When you dig a measuring cup into a compact bag of flour, it measures more flour than required. Use a smaller scoop to fill the 1 cup measure and then sweep the top with the flat side of a kitchen knife or spatula.
Pro Tip if using a digital scale: The Tare button zeros out the scale before/after adding each ingredient. eg. turn scale on, set unit (grams), place dough bucket on scale, press Tare - scale will read zero. Pour in water, add yeast. Press Tare - scale will read zero. Repeat with remaining ingredients, zeroing out the scale before each new addition.
The basic refrigerator dough recipe can be used for so many thing - try it with some of your family's baked recipes - you'll save so much time.
For a deep dive into all the pro tips, tricks and science behind bread making, check out my Resources section in the post.