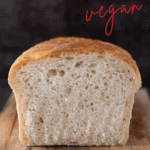
The best, soft and fluffy, easy white bread recipe (vegan) that's super simple to make. Using refrigerator dough, you skip over the mixing, proofing, and kneading and go straight to the shaping and baking. You'll never buy store-bought bread again!
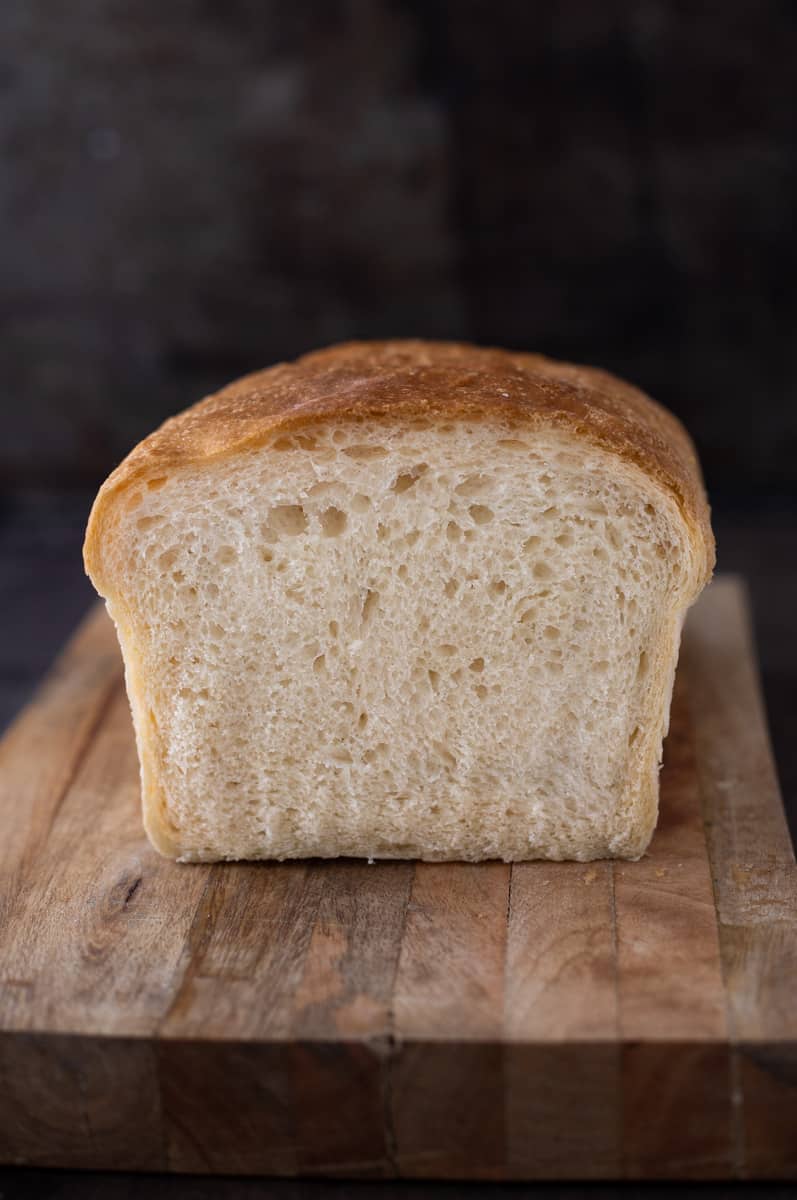
Bread is my first love. To me it's completely irresistible - soft, tender, fluffy cloud bread with a dark, flavourful crust. Plus it smells incredible.
Are you looking for an everyday white sandwich bread recipe that's easy and not overly complicated? Well, look no further. This fluffy white sandwich bread is delicious and easy to make with minimal effort and no kneading! Perfect choice for a classic peanut butter and jelly sandwich, a stack of French toast for breakfast or a giant Dagwood Vegetable sandwich for lunch.
I will guide you step-by-step, through the entire process using the refrigerator dough master recipe (sometimes known as crazy bread dough or miracle dough) so that you can begin shaping and baking your own fluffy loaf of white sandwich bread!
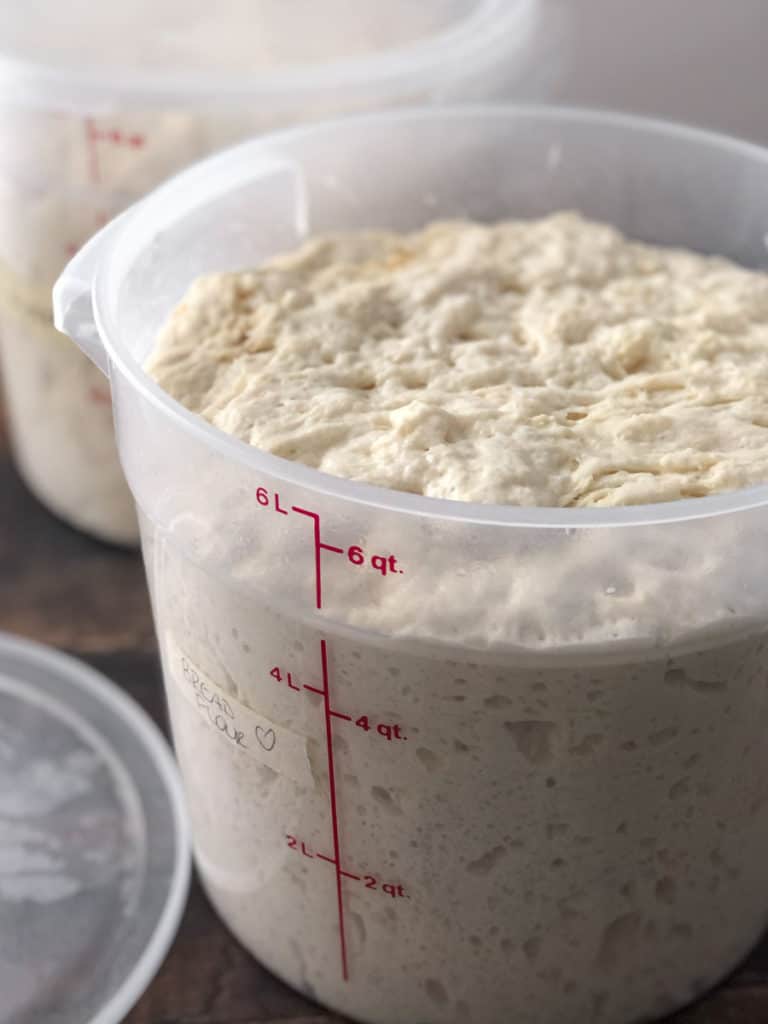
Once you've tried this simple pan loaf, use your bucket of refrigerator dough to make incredible rustic Dutch oven bread, crusty dinner rolls and soft buttery tear-apart buns. Any any leftover dough bits are perfect for small batch, vegan cinnamon rolls, a couple pita pockets for lunch or a batch of bread sticks.
This is definitely the quickest, most convenient and delicious refrigerator dough bread recipe you'll ever make. One tall, fluffy loaf of white sandwich bread coming right up!
Okay, let's bake bread!
Jump to:
- Ingredients for Easy White Bread Loaf
- Baking Day - Shape and Bake
- Shaping the Bread Loaf
- Why use Steam when Baking Bread?
- Baking a Soft and Fluffy Loaf of White Bread
- How to Tell if the Bread is Ready
- Basic Equipment for Making Bread
- Tips for Baking the Perfect White Bread
- Storage Tips for Bread
- Leftovers (breadcrumbs + croutons)
- Fluffy White Sandwich Bread Recipe (vegan)
Ingredients for Easy White Bread Loaf
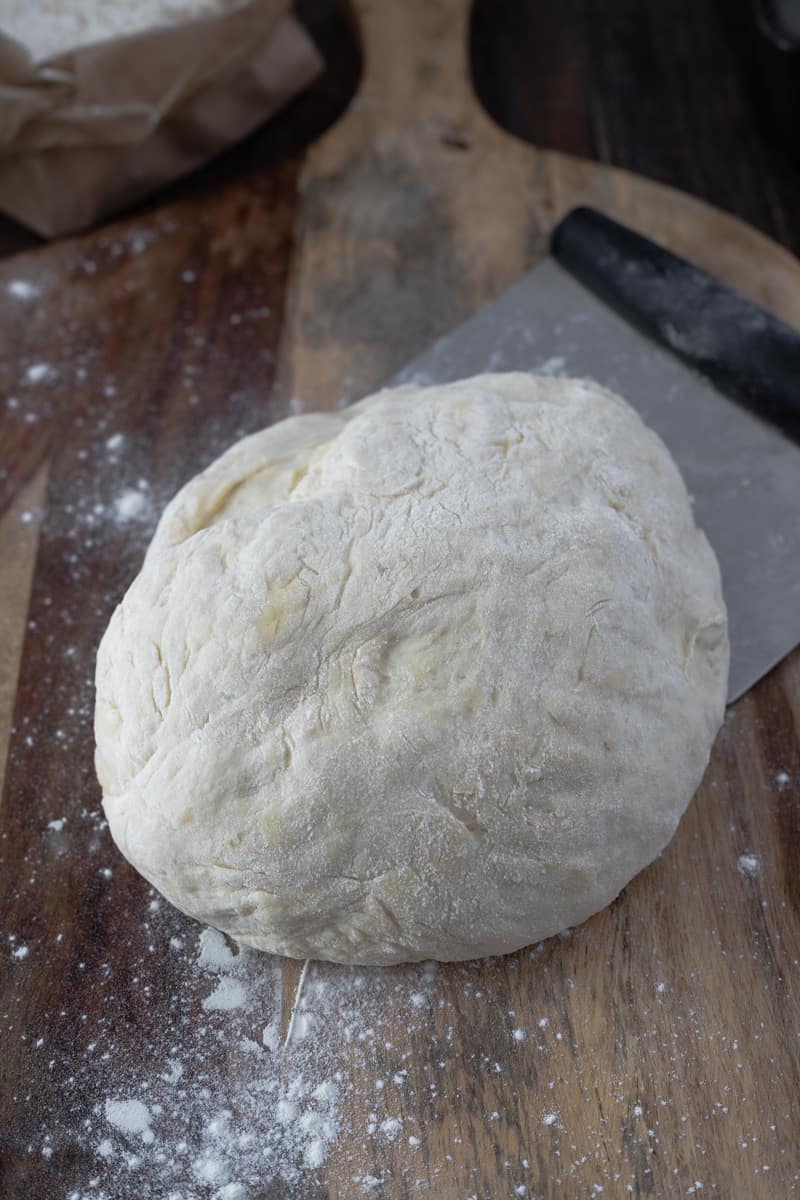
You'll need a 1 ½ lb chunk of your refrigerator dough (~ 675 grams), around the size of a small melon.
Baking Day - Shape and Bake
Make your all purpose refrigerator dough recipe anytime up to two weeks before baking day. This dough is easiest to handle after it has spent some time in the fridge.
On baking day, cut off a chunk of dough and shape your loaf.
Shaping the Bread Loaf
There are as many ways to shape bread as there are bakers. I've tried a lot of methods from all my practice with sourdough bread. The goal is to develop some structure while creating a smooth, taut surface on your loaf. Here's one method:
Lightly dust surface of dough. Cut off a chunk (1.5 lb size), place flour side down on a lightly floured work surface.
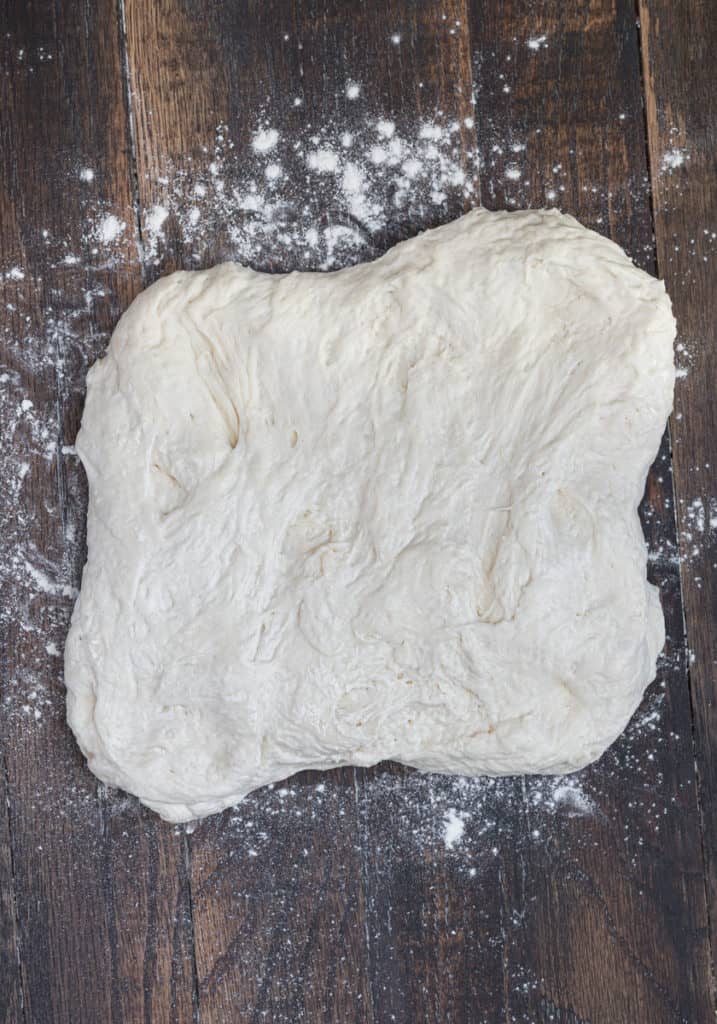
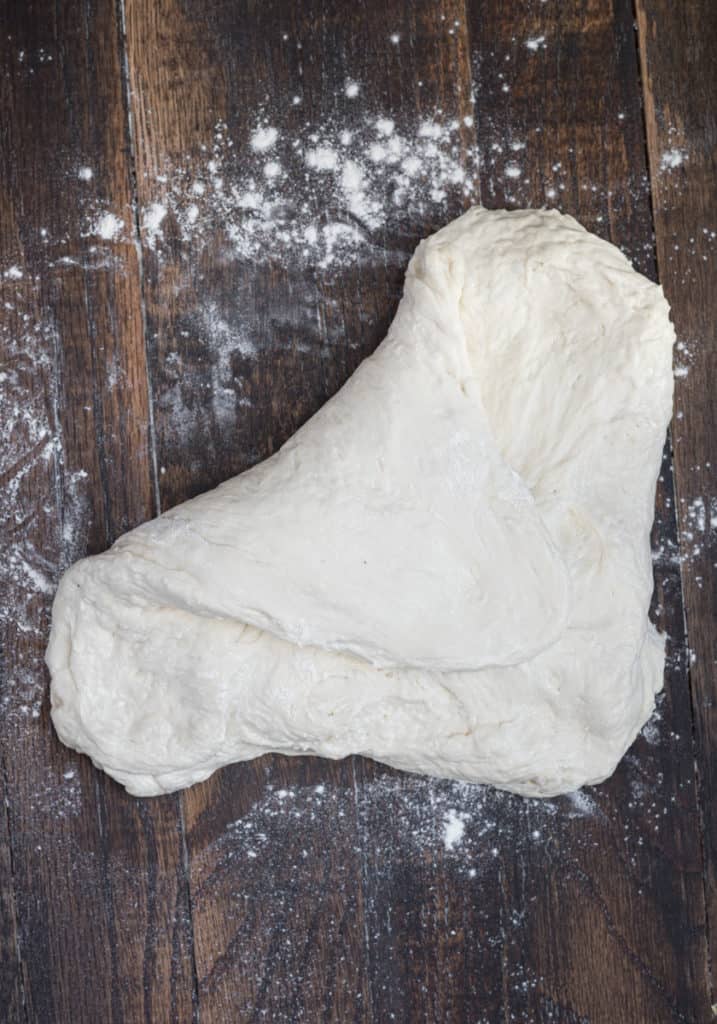
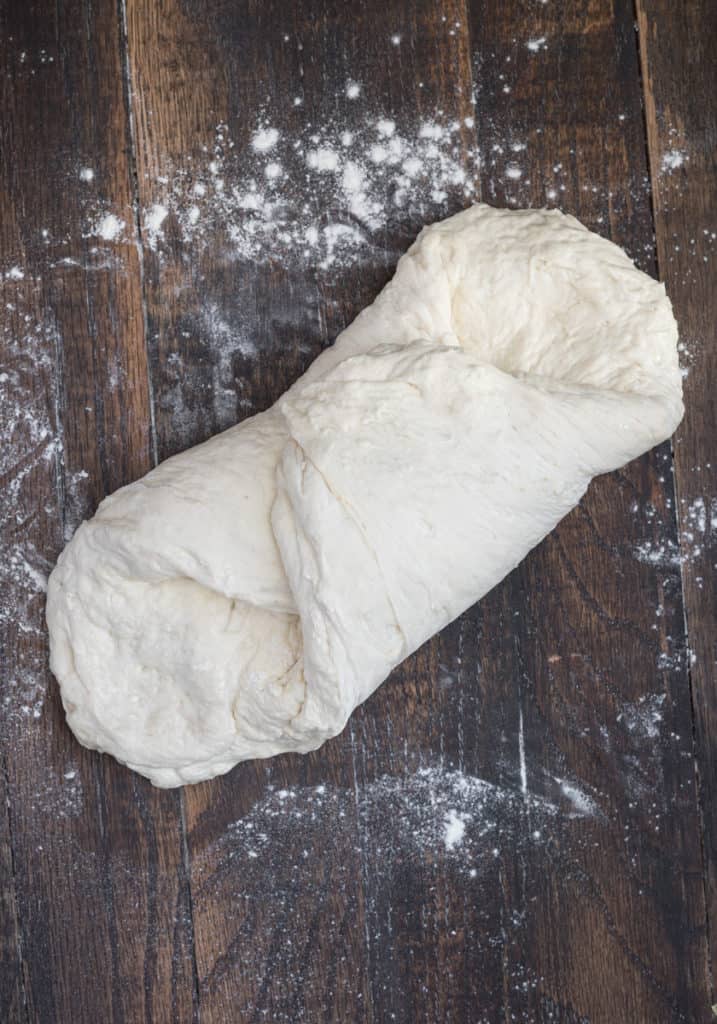
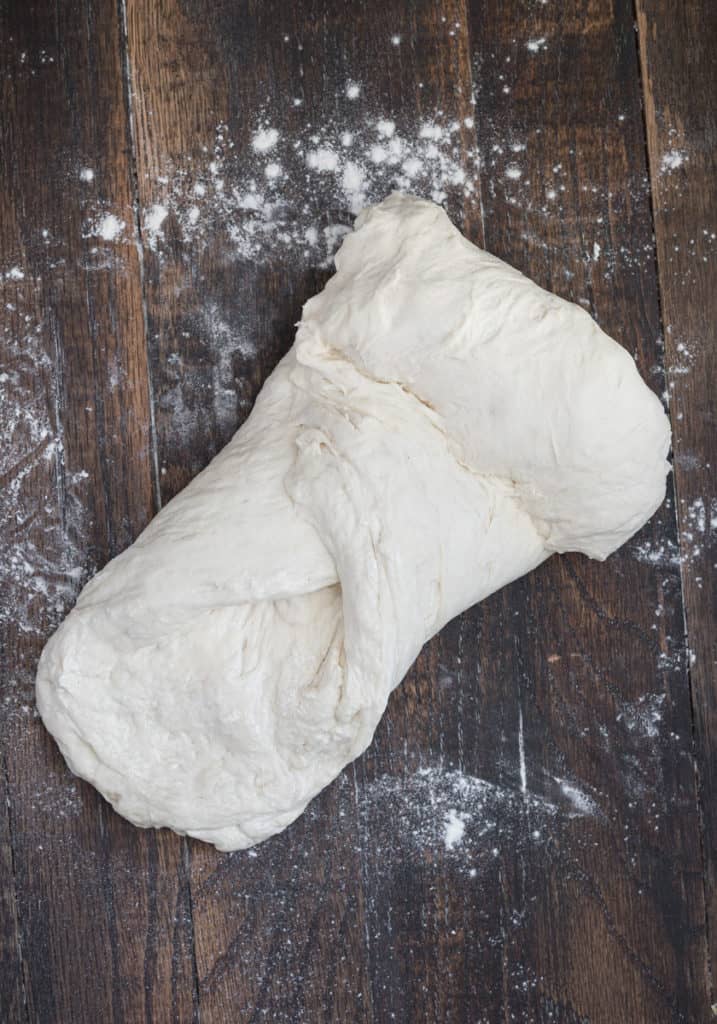
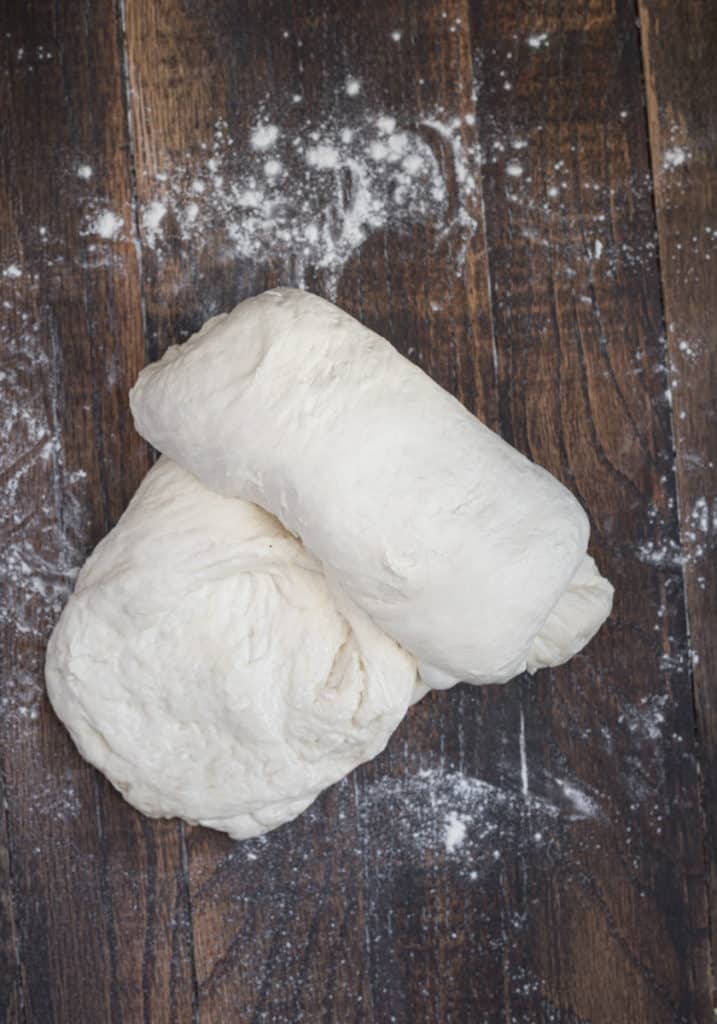
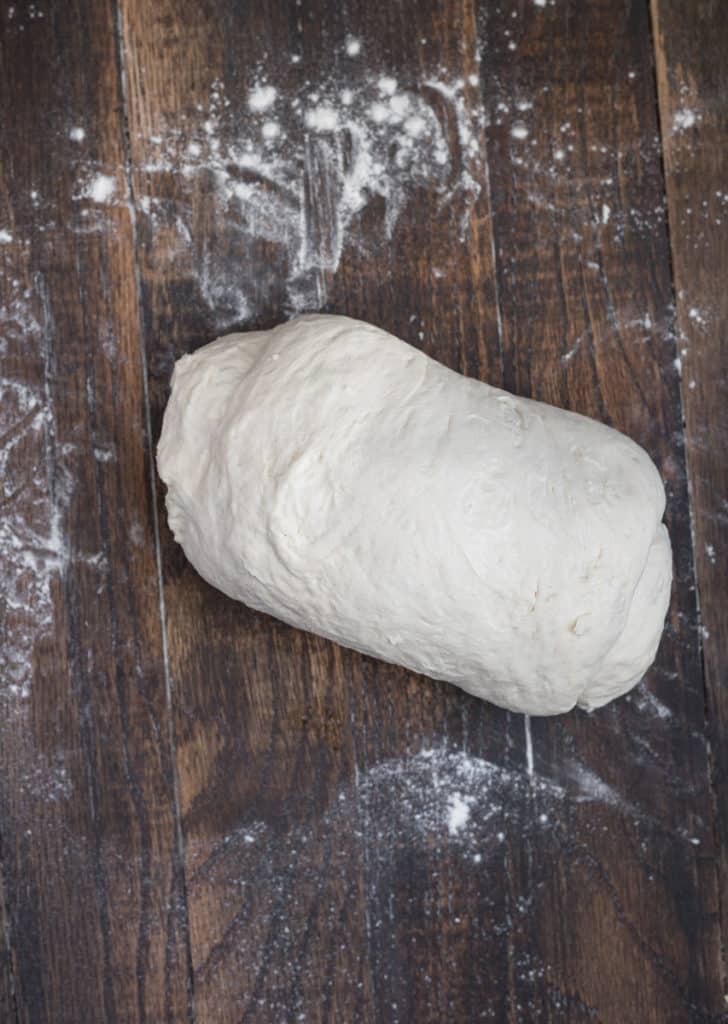
- Shape the dough into a ball and then flatten it slightly with your palm/fingers.
- To form the loaf, fold the left side ⅔ over the right side.
- Then fold the right side so it's overlapping the first fold.
- Grab the top flap, roll it over itself (jelly roll style).
- Keep rolling and gently pulling the loaf toward you until all the dough is rolled.
- Cup your hands around the dough while gently pulling it toward you a couple times while simultaneously elongating the dough to a loaf shape. This creates a smooth, taut surface.
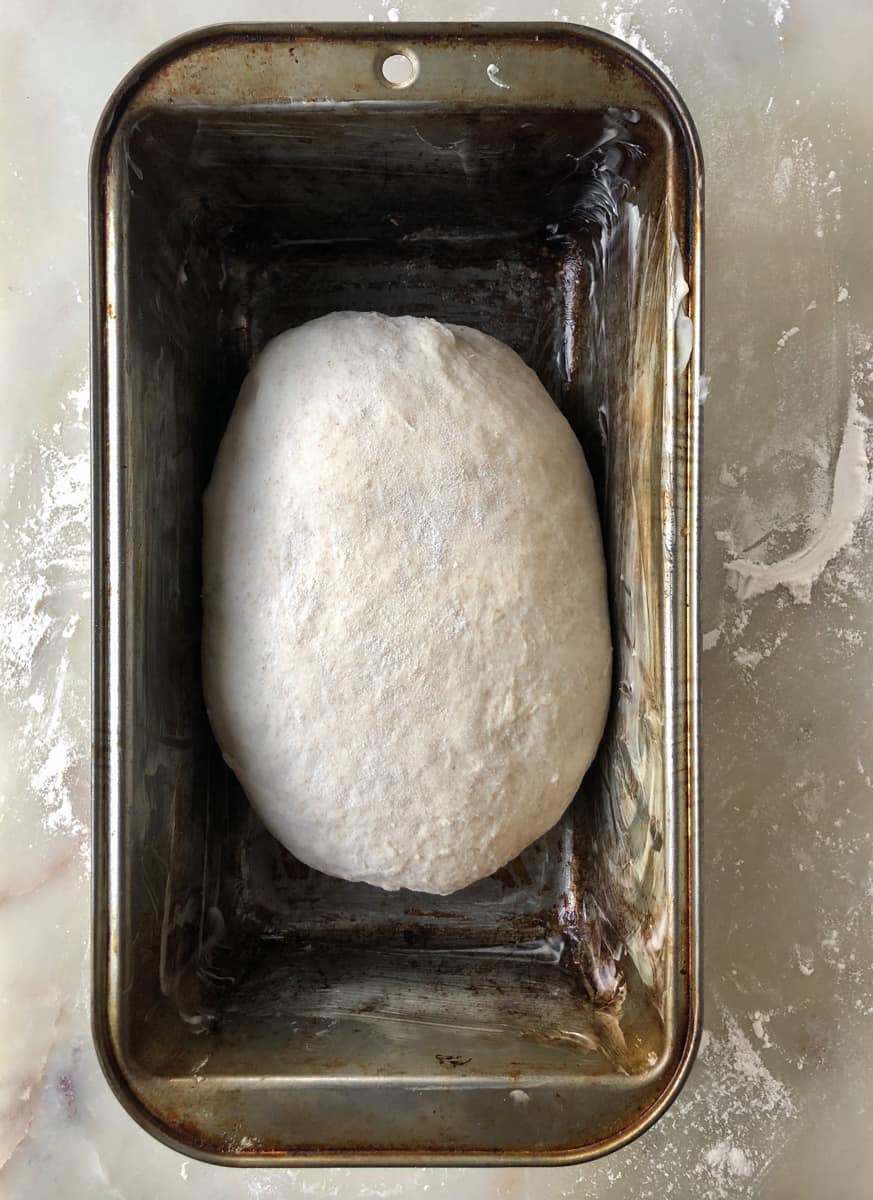
Place seam side down in a generously buttered or oiled loaf pan.
Cover and let rest 60-90 minutes while oven preheats.
Why use Steam when Baking Bread?
I learned the most about baking bread with steam on my sourdough bread making journey. Steam keeps the surface of the bread moist so the bread can expand quickly as it bakes. If the crust forms too quickly, the loaf's ability to rise (oven spring) is hindered which produces a flatter loaf with denser crumb and a thicker crust.
Of course, most home bakers don't have a fancy steam oven in their kitchen (I don't!). Here are a few options that work for me.
For reference: I have an old electric oven. Place a shallow pan or cast iron skillet in the oven on the lowest rack while the oven is preheating. When the bread goes in to bake, pour water into the hot pan on the bottom rack. Quickly close the oven door to trap the steam.
Steam escapes my oven through the back left burner so I cover it with a large kitchen towel to keep the steam in. This method works remarkably well for me. When the bread is ready, a big cloud of steam puffs out of the oven so use caution.
Another method is to mist the surface of the bread with water just before placing it into the oven. As well, some bakers have success spritzing the oven walls and quickly closing the door. This creates less steam than the pan method above, but still increases the moisture during the first stage of baking.
Baking a Soft and Fluffy Loaf of White Bread
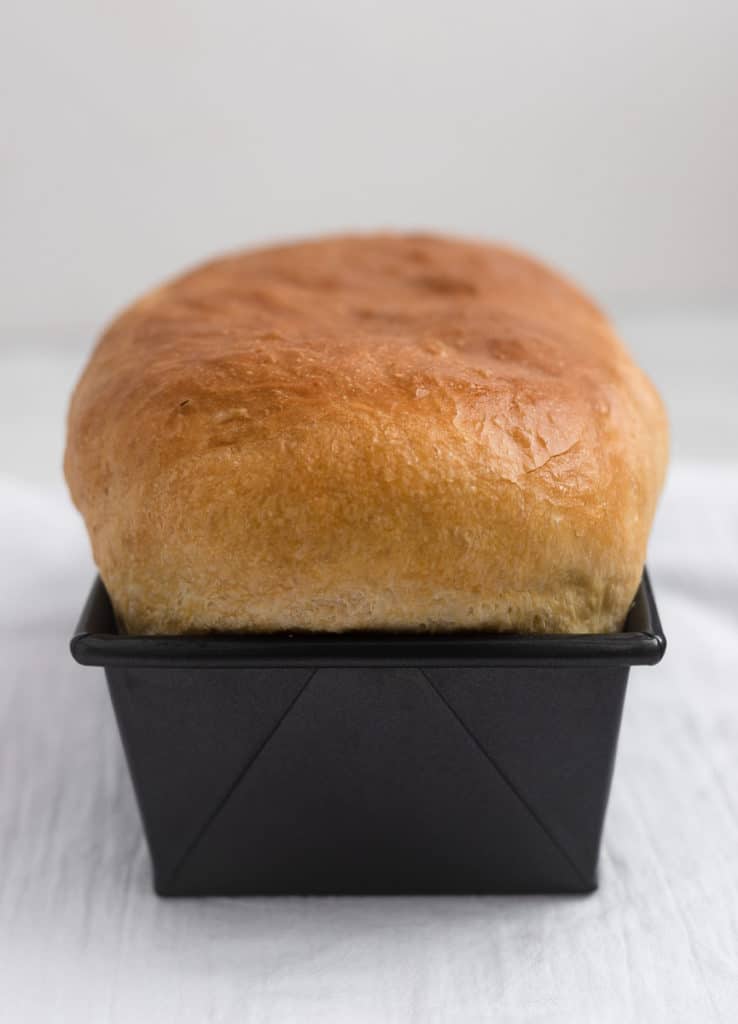
Because this is what is known as a lean dough (made without eggs, butter or dairy), it can be baked at a higher temperature. 400º F. But it is turns out perfectly baked for longer at 350º F if you prefer.
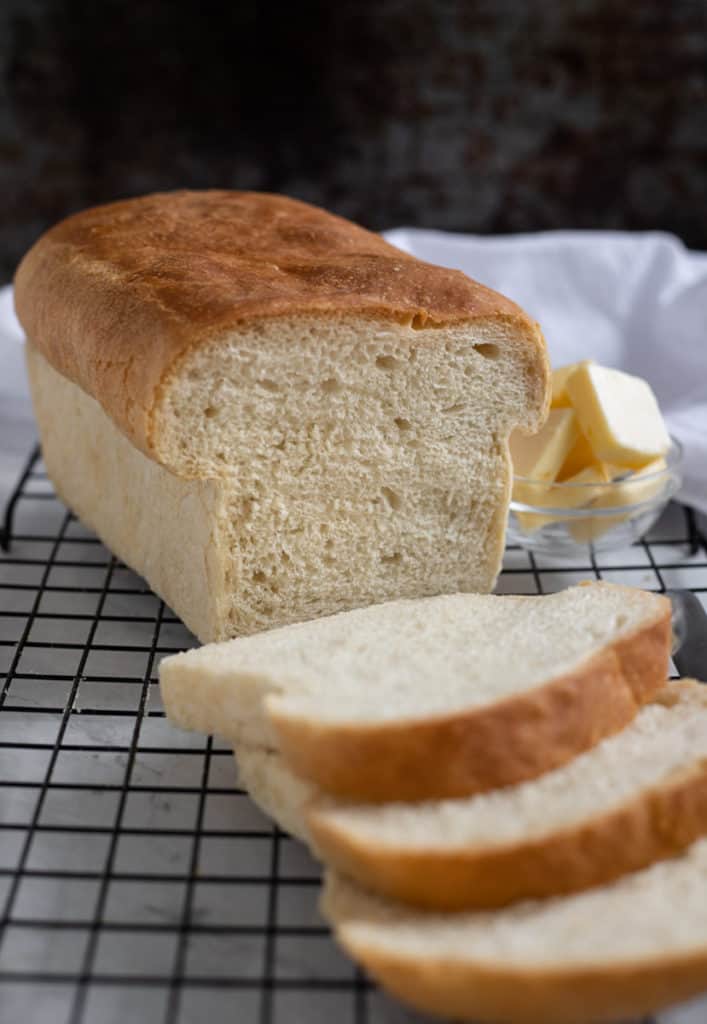
To remove the bread from pan, tip the pan and tap the bottom corner on the counter. The loaf will pop right out. *For best results, don't leave the bread to cool in the pan - transfer to a cooling rack.
Pro Tip: once you've released the bread from the tin, if the sides or bottom are a bit pale, put the loaf (without the pan) back into the oven for 5 or 10 minutes while it toasts up.
How to Tell if the Bread is Ready
The loaf will have a dark golden brown crust. Once released from the pan, check the color and texture of the sides of the loaf - they should have colour and be firm (not soft and pasty). The bottom of the loaf will sound toasted when you scratch your finger nail across it. When you tap the top of the loaf it will sound hollow. The house will smell amazing!
If you have a digital thermometer (I don't), the internal temperature of a fully cooked loaf of bread should be ~200-210º F.
Basic Equipment for Making Bread
This is a list of basic equipment that will make your bread making experience easier, but it's not necessary to run out and buy new equipment, start off using what you have at home. (As an Amazon Associate I earn from qualifying purchases.)
- Food Scale - baking is a more precise science than cooking. A food scale makes baking so much easier. I've been using this same one several times a week for years. Escali, Arti Digital Scale
- Loaf Pan, standard size pan 8 ½" x 4 ½" x 2 ¾" for 1 - 1 ½ lb loaf. Large size pan ~9 ½" x 5 ½" for 1 ½ - 2 lb loaf.
- Digital Thermometer - used for checking the internal temperature of the bread (optional).
- Bench/Dough Scraper - optional but wonderful for mixing, folding and cutting the dough as well as clean up. Plastic dough scraper and metal bench scraper (I use both).
- Bread Knife - heavy serrated bread knife.
Tips for Baking the Perfect White Bread
- Weighing ingredients is more precise than measuring which works better for baking!
- Loaf Pan - butter inside the loaf pan or line with parchment paper to prevent sticking.
- Be sure to preheat the oven with the rack in the middle position. Wait for the oven and pans to be fully preheated.
- Oven thermometer - double check your oven temperature by placing an inexpensive oven thermometer on the middle rack of your oven. You may need to adjust temperature or timing of your baking if your oven runs a bit hot or cold.
- Steam - use the water pan method (details in post) or spritzing.
- Don't open the oven door during baking. The steam will escape - bad news. The oven spring happens in the first stage of baking, so you want a nice even, hot oven with lots of steam for best results. Turn the light on and peek through the window if you are curious.
- If the bread sticks to the pan, pop it back into the oven for 5 minutes.
- The bottom of bread should be toasty when scratched and sound hollow when thumped. If it's pale and soft, place back in the oven (without the pan) for 5-10 minutes. May have to turn it upside down.
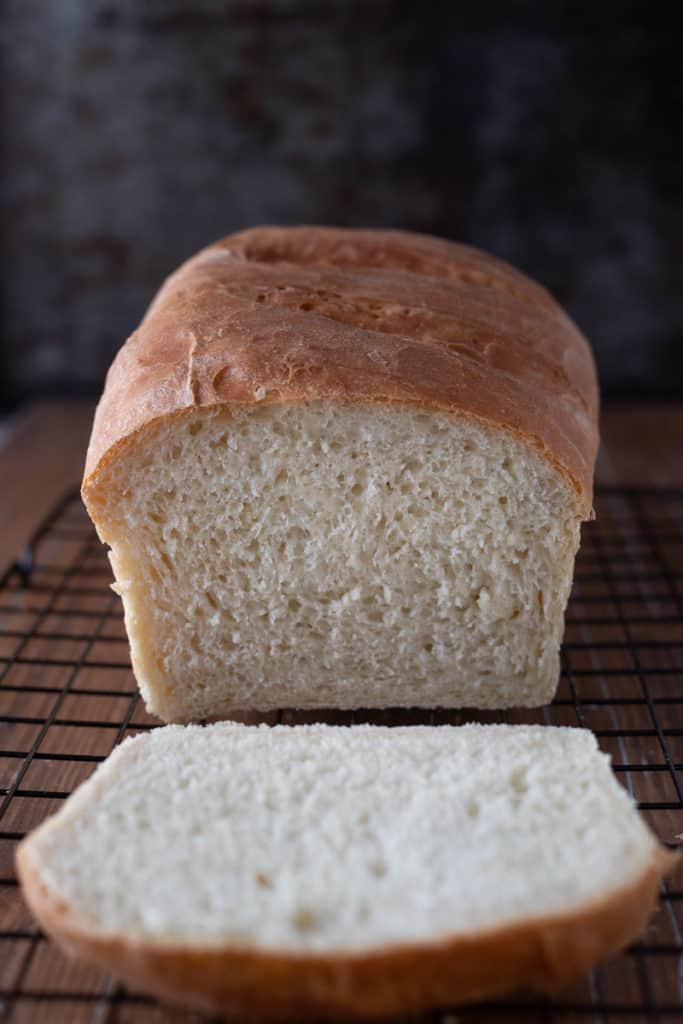
- Cool on cooling rack so the air can circulate and the bread isn't steaming and becoming soft.
- Don't cut into the bread until it's fully cool.
Storage Tips for Bread
Of course bread is the most delicious when eaten fresh especially since there are no preservatives in this recipe.
However, I store this everyday sandwich bread in a bag on the counter (for a few days) or in the fridge (for a week) with excellent results.
Freezing Bread - if you have some bread that you aren't going to eat right away, slice it and place in a plastic bag in the freezer. This makes it easy to grab a slice or two to use as needed. The bread will keep well in the freezer for up to a month.
Leftovers (breadcrumbs + croutons)
Make easy, flavourful breadcrumbs or crunchy croutons with leftover/stale white bread crusts and ends.
Homemade Breadcrumbs - If you have a crust or a couple slices of bread leftover and are thinking of tossing them - STOP! It's easy to make this Tasty Italian-style Breadcrumb recipe (freezes really well too).
Homemade Croutons - Make easy homemade croutons with leftover bread: Slice the bread, lightly drizzle with olive oil and sprinkle with garlic powder on both sides. Place on a baking sheet, on the center rack, in the oven at 350º F until golden brown and crunchy (flip halfway through). Chop into bite-size pieces. Store in an airtight container in the pantry or freeze them.
Pro Tip - Keep a bag for random bread crusts and pieces in the freezer until you have enough to make a big batch of bread crumbs or croutons!
Did you make my Easy White Bread Recipe? If so, giving it a star rating and comment helps others discover my blog and recipes.
Thank you so much for your support!
I love seeing your creations so tag me on IG @ceeceecooks and Facebook!
NEVER MISS A RECIPE: Sign up for my email NEWSLETTER!
Fluffy White Sandwich Bread Recipe (vegan)
Rate this recipe!
Equipment
- loaf pan
- kitchen scale (optional)
INGREDIENTS
- 1 ½ lb piece of all-purpose refrigerator dough*
- butter for pan
- sesame seeds (optional)
INSTRUCTIONS
- **Make a Bucket of All Purpose Refrigerator Master Dough and store in the fridge for up to two weeks before baking.**
- Prepare a standard loaf pan (8 ½ x 4 ½") by buttering the insides and bottom. If your pan is slightly larger (~9 x 5) not to worry, it will work fine. Your final loaf will just be a bit longer, wider, and shorter (not too much).
Shaping the Loaf
- Dust the surface of the refrigerator dough lightly with flour. Twist off a 1 ½ pound piece of dough off (about the size of a small melon)
- Turn the dough (flour side down) out onto a lightly floured counter.
- Shape the dough into a ball and then flatten it slightly with your palm/fingers. To form the loaf, fold the left side ⅔ over the right side. Then fold the right side so it's overlapping the first fold. Grab the top flap, roll it over itself (jelly roll style). Keep rolling and gently pulling the loaf toward you until all the dough is rolled. Cup your hands around the dough while gently pulling it toward you a couple times while simultaneously elongating the dough to a loaf shape. This creates a smooth, taut surface.
- Place the loaf seam side down into the prepared pan.
- Cover and let rise for 60-90 minutes in a warm location (not direct sun). Pro Tip: if your kitchen is cool/cold, it may take longer for your bread to proof.
- Preheat the oven to 400º F with rack on center position.
- Place a shallow pan or cast iron skillet on bottom shelf.
- When ready to bake, place the bread pan on the middle rack and pour hot water in the lower pan. Close the oven door to capture the steam. (Check out the post for more steam tips and techniques.)
- Bake for ~40 minutes. If after 30 minutes the loaf is getting too dark, reduce the heat to 350º F and loosely cover the top with a piece of foil. (Don't be tempted to open the oven door prior to this as the steam will escape which is bad news for the bread.)
- Remove from the pan by tapping the bottom corner of the pan on the counter and tip pan. The loaf should pop right out. If it is stuck, put the whole thing back in the oven for 5 minutes.
- When ready, the top will be dark golden, the top will sound hollow when tapped, and the bottom will sound toasty when you run your fingernails across it.
- If the loaf is pale and steamy on the sides and bottom when you remove from pan, place it back in the oven (without the pan) for another 5-10 minutes.
- Let it cool completely before slicing.
- Store on the counter or in the fridge in a plastic bag.
NOTES
This recipe is from simplyceecee.co food blog. All images and content are copyright protected. Please do not use my images or republish this recipe without prior permission. Thank you.



Wendy
I make bread on a regular basis with great success. This recipe is so easy and makes the loveliest light white bread I have ever had! Thank you for sharing!
Tracy Halasz
So happy to hear that you love the bread recipe. Thanks for the review!
Arleigh
This bread comes out perfect every time. I put it in an 8x4” greased pan or make it like a French Loaf on a parchment lined baking sheet. The crust is superb always a bit crispy with a soft chewy inside. If it’s a bit crusty on the top I put a clean kitchen towel over it when it comes out of the oven and voila! Perfect….the go to bread recipe
Sandi
My first attempt is a nice airy bread with good flavor, but the crust is almost rubbery. I used fresh yeast and increased time of dough on counter before refrigerating. My refrigerator dough was 3 days old. I formed the loaf and let rise 4 hours, baked at 425 (my oven runs cooler so it was probably 400) and put water in a broiler pan on shelf below (I also have a place where steam escapes). It's very white and I almost left it in the oven longer in hopes it would brown up. Any suggestions?
Tracy Halasz
Good morning, so happy you love the flavor and texture of the bread. There are a few things that can affect the crust: too much steam prevents the crust from caramelizing so you could try no steam to see if that works better in your situation. Over proofing the bread can affect the color and texture of the crust as well so a shorter rise before it goes into the oven perhaps will make a difference. If the oven isn't hot enough that can also affect the crust (and rise). I use an oven thermometer to check my internal oven temperature and also make sure I have a long enough preheat.
As well, brushing the loaf with a wash (traditionally egg wash but there are lots of vegan versions such as plant based milk or butter that work perfectly) before baking helps produce a golden crust.
Maybe try one of these suggestion at a time, baking just a roll/bun to see how it turns out until you find the perfect crust with your altitude, oven, and ingredients. There's always the Dutch Oven method if you can't get the results you are after with the loaf pan. Good luck and let me know how it turns out for you. I've got my fingers crossed.